Making a successful application for admission into a tertiary institution is a skill that can be learnt. Many times, applicants end up not being accepted not because they do not qualify, but because they did not make a proper application. It is therefore important that you know about the different ways of applying, and how to carry out such applications. Even if you qualify, your application can be rejected if the information you have provided is not complete or clear.
Applications into colleges and universities generally come in two forms. The application can either be done online (via the internet using a phone or a computer) or using an application form bought at the university or another place authorised by the university. With both kinds of applications, there is an application fee that is required for the application to be processed. This is usually deposited into the institution’s bank account and the copy of the deposit slip is attached to the application documents or it is paid in cash upon purchasing of an application form.
Online applications have the advantage that they can be done from anywhere without travelling to buy or submit a form. They can be filled in easily from anywhere provided there is internet connection. Also, the system is automatic and any information that is not entered correctly or any documents not submitted will not allow an applicant to complete the application. The system therefore ensures that the application is done correctly, and all applications submitted are thus valid and will be considered. The other advantage is that since they are automated, there is no chance that could choose a program that the university does not offer or will not be offering any more. The application fee is deposited into the institution’s account and a scanned copy of the deposit slip is uploaded into the system along with scanned copies of other required documents such as NRC, statement of results/certificate and passport size photos.
Physical applications (hard copy) are made using printed application forms. These can either be bought from the institution or downloaded from the institution’s website and printed out. In a case where the form is downloaded and printed out, the application fee is paid into a bank account and a photocopy of the deposit slip should be attached to the application form. The applicant needs to fill out the application form with the information required accordingly. Additional documents such as photocopies of results, NRC / birth certificate, passport size photos etc, depending on what is required, need to be attached to the application form. Attaching of documents should always be done with paper clips and not by stapling. The filled in application form should then be mailed to (sent via post office or express mail) or physically handed in at the institution. We do not recommend using post office mail because it can delay in arrival causing you to miss the deadline. We advise using express mail services (e.g., DHL, Mercury, FedEx and EMS) when sending any application.
Some universities do not allow grade 12 school leavers direct entry into specific programs such as law, economics, engineering and medicine to mention a few. These are known as non-direct entry programs. School leavers who wish to study non-direct entry programs are first admitted to a non-quota (NQ) program where they learn the foundation subjects in the first year. They branch off into their desired programs in the second year. You therefore should not apply directly for non-direct enty programs but should apply for the appropriate NQ program. Examples of NQ programs are: Bachelor of Science NQ (for engineering, medicine, etc.), Bachelor of Arts NQ (for law, economics, etc.), Pre-medicine/Medical Foundation Program (for medicine and other health-related programs). Check with the university before applying to find out whether the program you want is direct entry or not because this varies from institution to institution.
Here below, you will find a sample of a physical application form with comments on how to fill in each section written below each page. You will also find a sample of an online application also with comments on how it should be completed.
Sample of a Physical Application Form
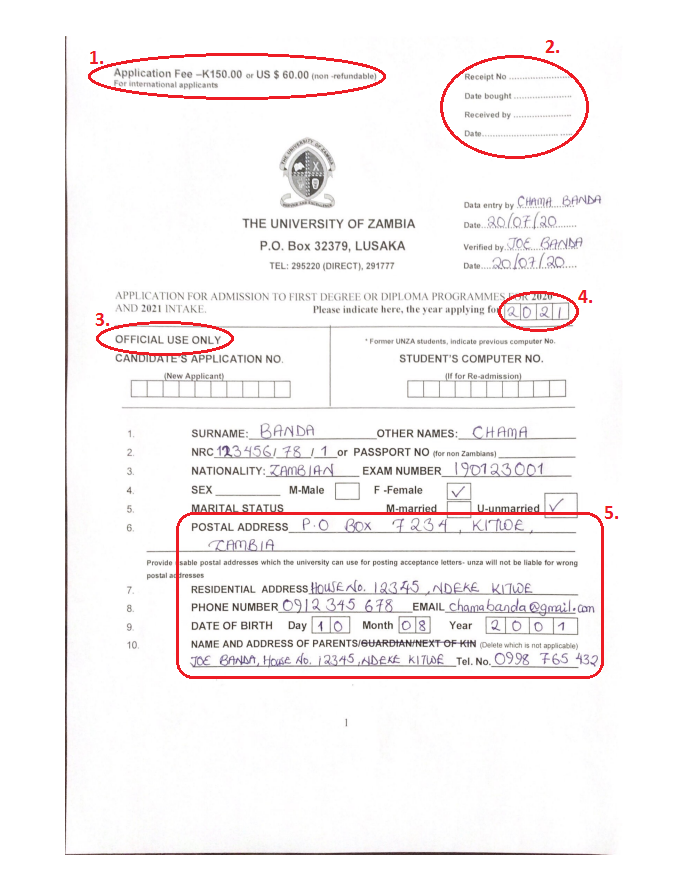
COMMENTS
- This is the price of each form.
- These details will be provided for you when you pay for the form.
- Wherever you see the words OFFICIAL USE ONLY, do not write anything in that section.
- Indicate the year in which you wish to be admitted. Some forms may also include the intake such as January or July intake.
- Make sure you write correctly and clearly your contact details.
i) Email address and Phone number: The university will most likely contact you through email or phone. Make sure you indicate a working email address and phone number. If you do not have an email address, you can easily create one with Gmail by simply opening a google account. Google “how to open a google account” for instructions on how to go about this.
ii) Postal address: If you do not have one, you can use that of your Church or a nearby school. Just make sure you inform the Church secretary or the school secretary so that they can let you know in case you receive any mail.
iii) Residential address: This is the address of where you live. Some townships do not have house numbers. In that case it is okay to just indicate the township name and the name of the district.
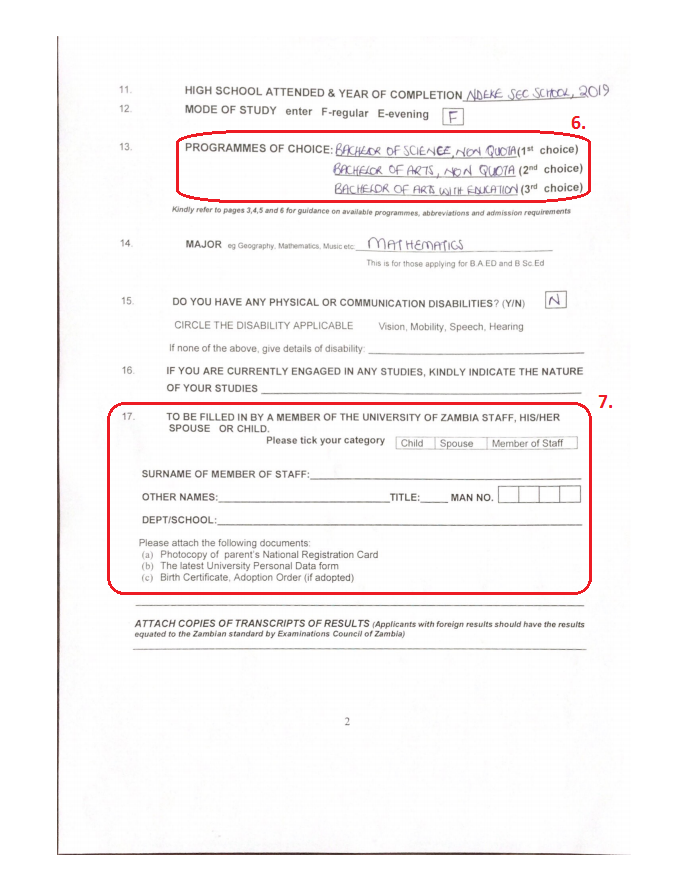
COMMENTS
- These are the programmes you are applying for. Make sure you check that your desired programme is available for that year. It is not mandatory to put all three choices; you are free to put one, two or three.
- This part is for those who are university or college employees, their spouse or child. Some universities or colleges may have a special arrangement for these people when it comes to payment of fees.
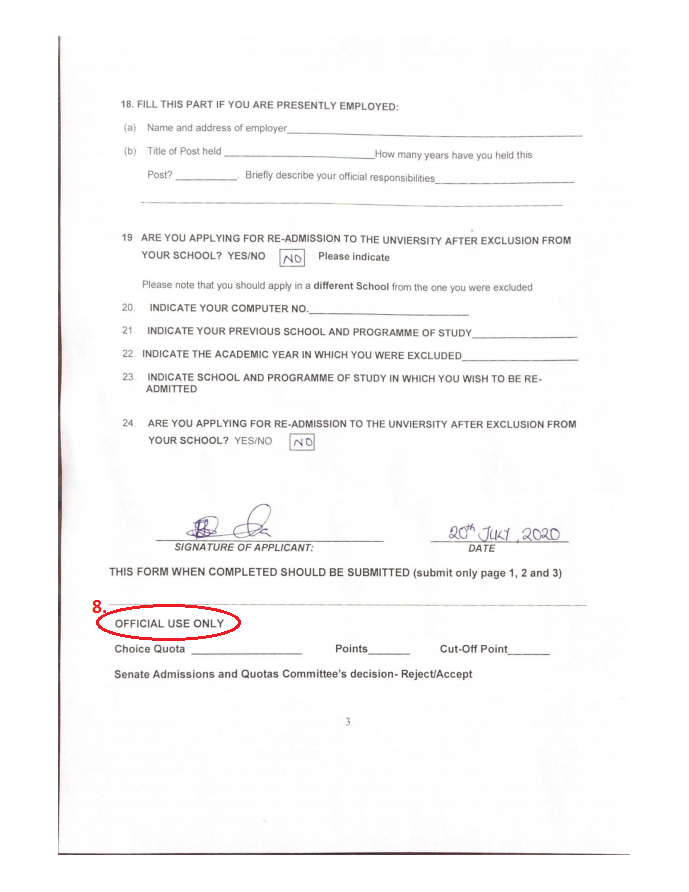
COMMENTS
- Wherever you see the words OFFICIAL USE ONLY, do not write anything in that section.
Sample of an Online Application
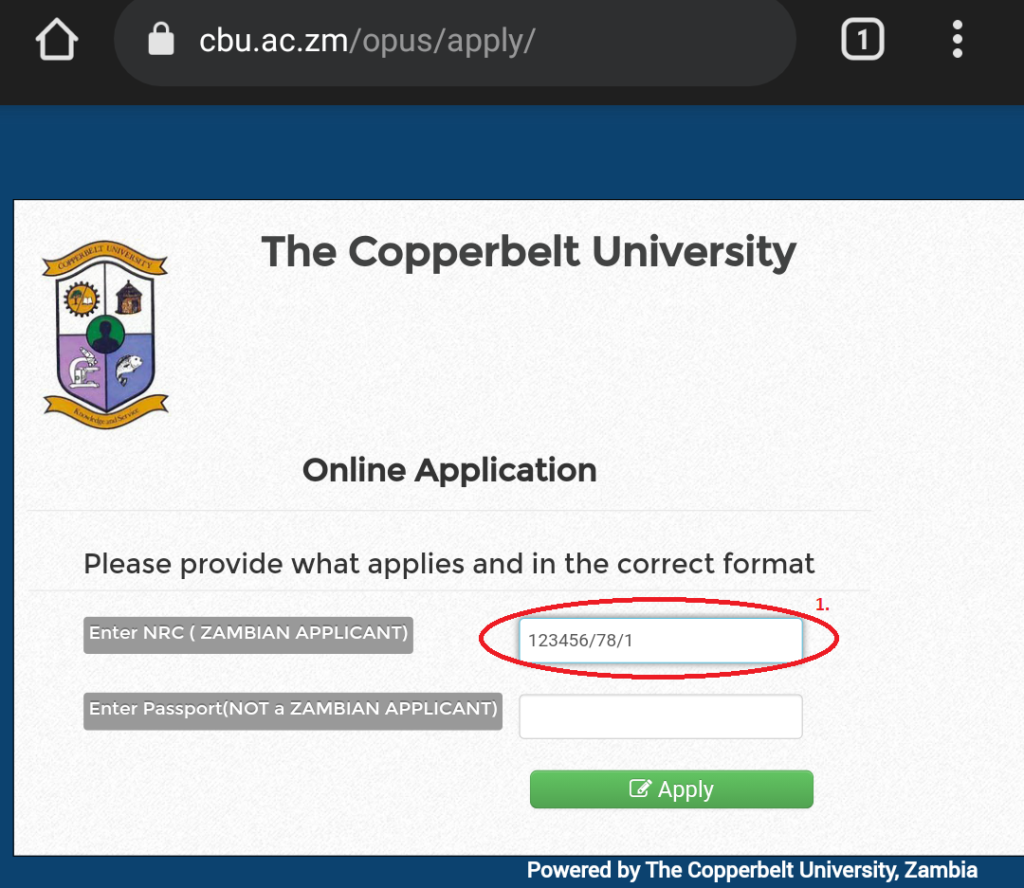
COMMENTS
- Some online application websites will start with this page where you put your NRC or passport number so that even if you don’t finish the process the system will save the data you have entered. The next time you put in your NRC, that data will come back automatically.
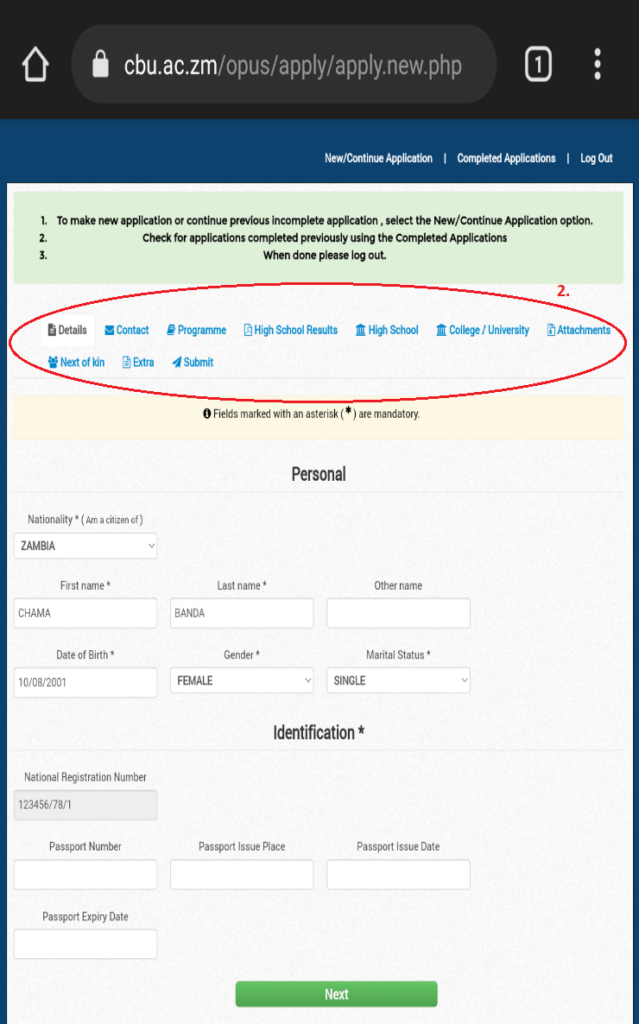
COMMENTS
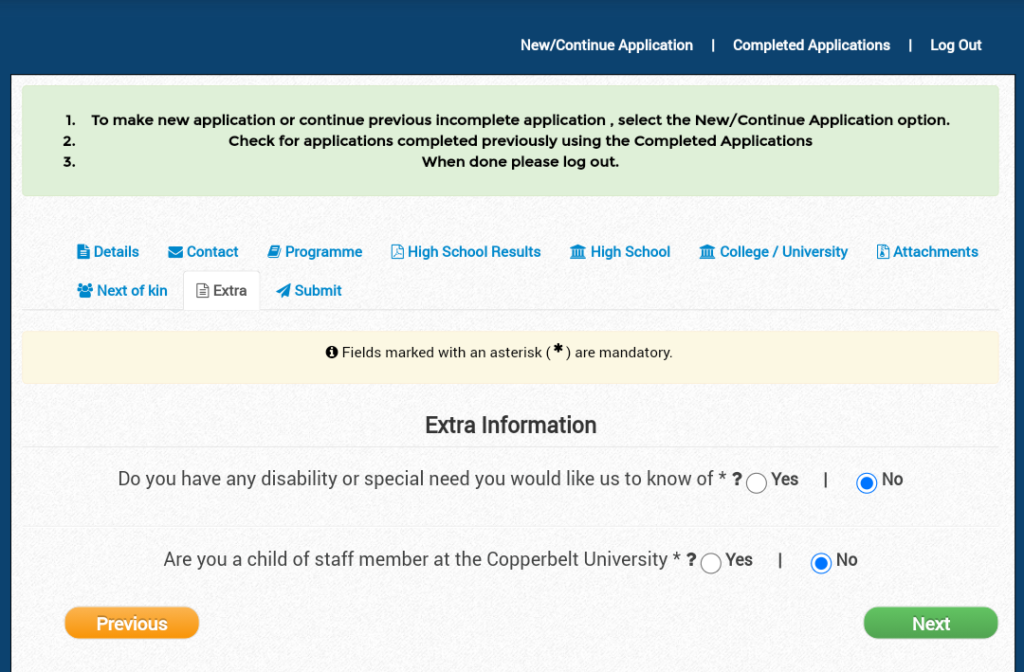
- The tabs shown up here represent sections of the application. You can scroll back and forth through them. To edit the information you provided in a particular section, you can simply click on that section and the system will take you back to the section.
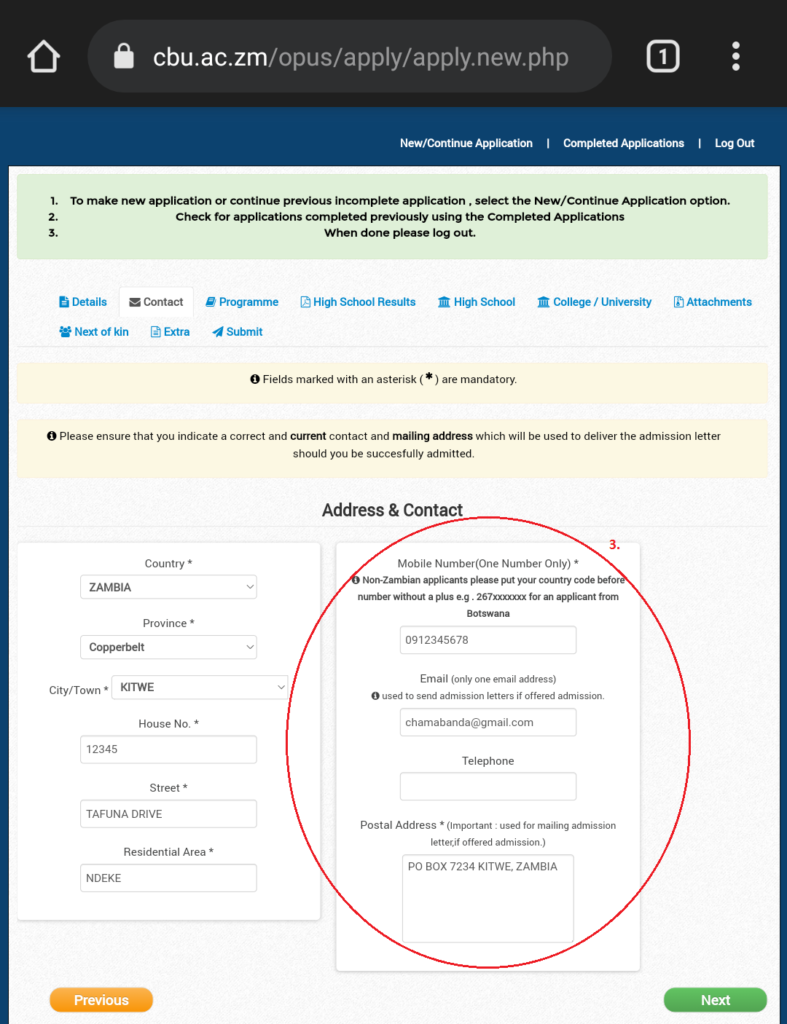
COMMENTS
- Make sure you write correctly and clearly your contact details.
i) Email address and Phone number: The university will most likely contact you through email or phone. Make sure you indicate a working email address and phone number. If you do not have an email address, click here to learn how you can open one with Gmail in a few easy steps.
ii) Postal address: If you do not have one, you can use that of your Church or a nearby school. Just make sure you inform the Church secretary or the school secretary so that they can let you know in case you receive any mail.
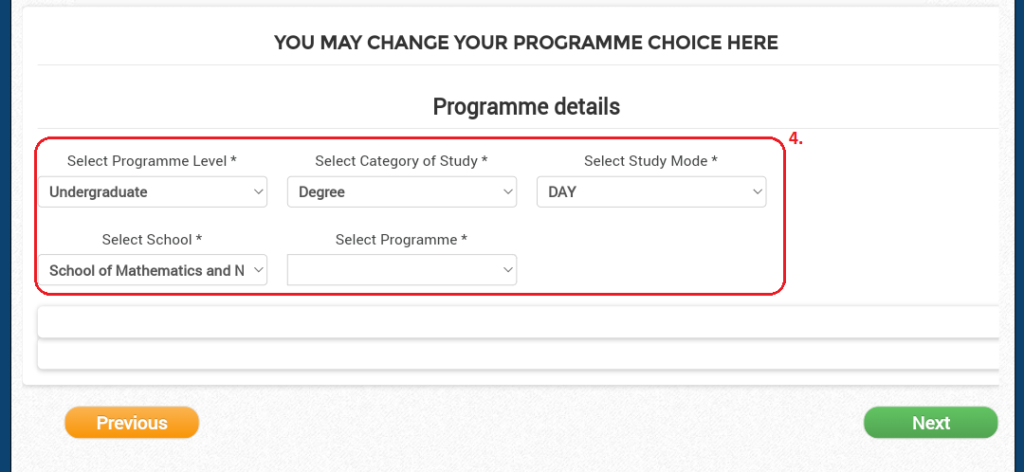
COMMENTS
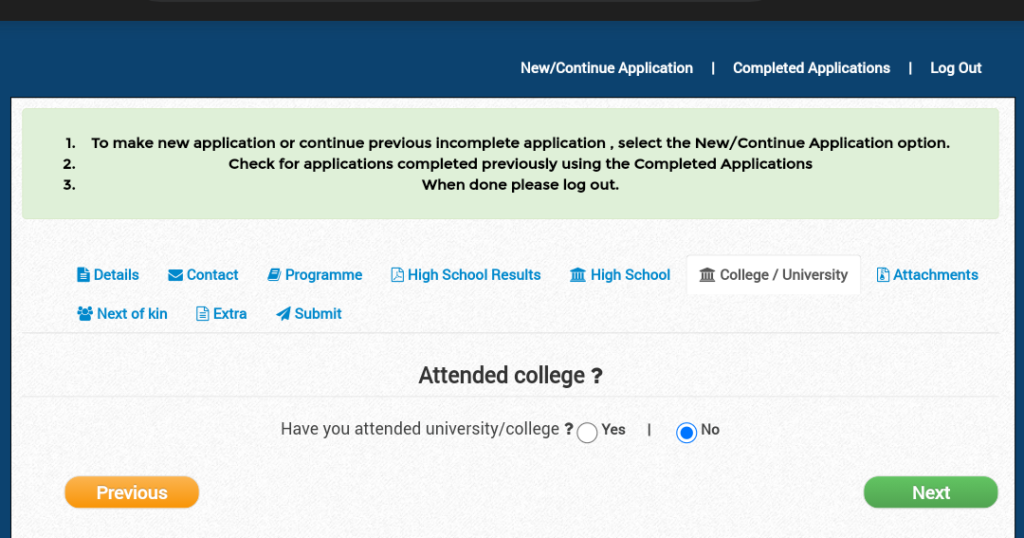
- This is where you choose which programme you want to be accepted in. It will include the level, category of study, study mode, school and the programme. If you are a school leaver (you just finished your grade 12) then you are an undergraduate. On the study mode some platforms may indicate DAY or FULL TIME or REGULAR. These mean the same thing.
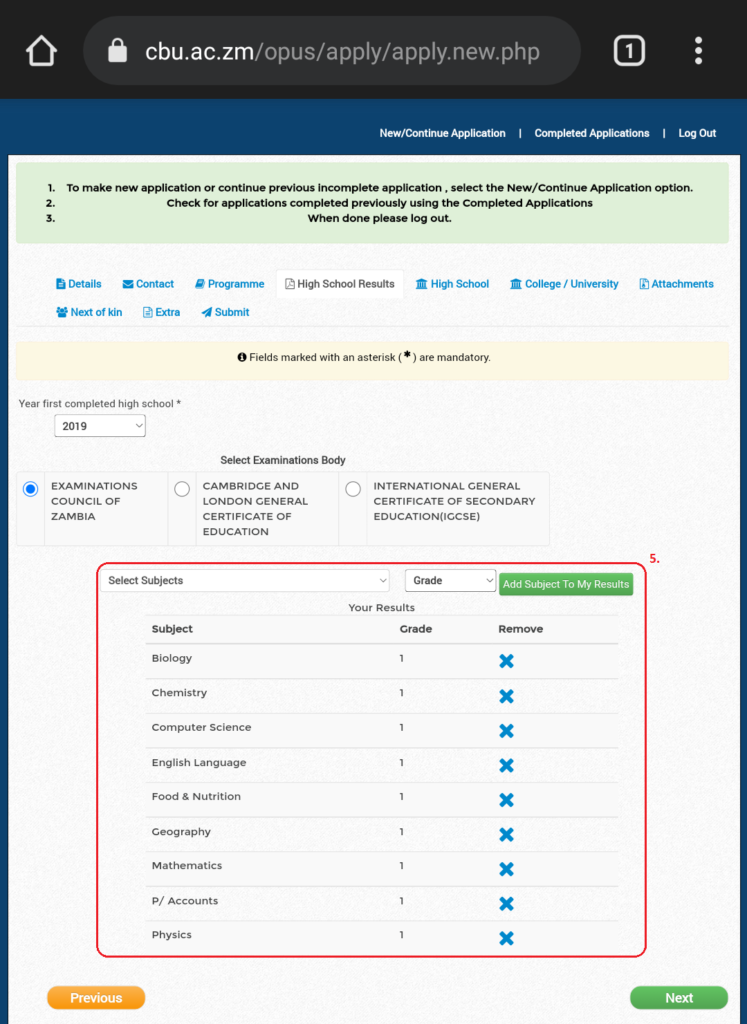
COMMENTS
- Some online platforms may not include this part where you manually put your results. Make sure you put the correct results. Remember that the university or college will still ask you to upload your results. Therefore, this is just a copy for the system.
COMMENTS
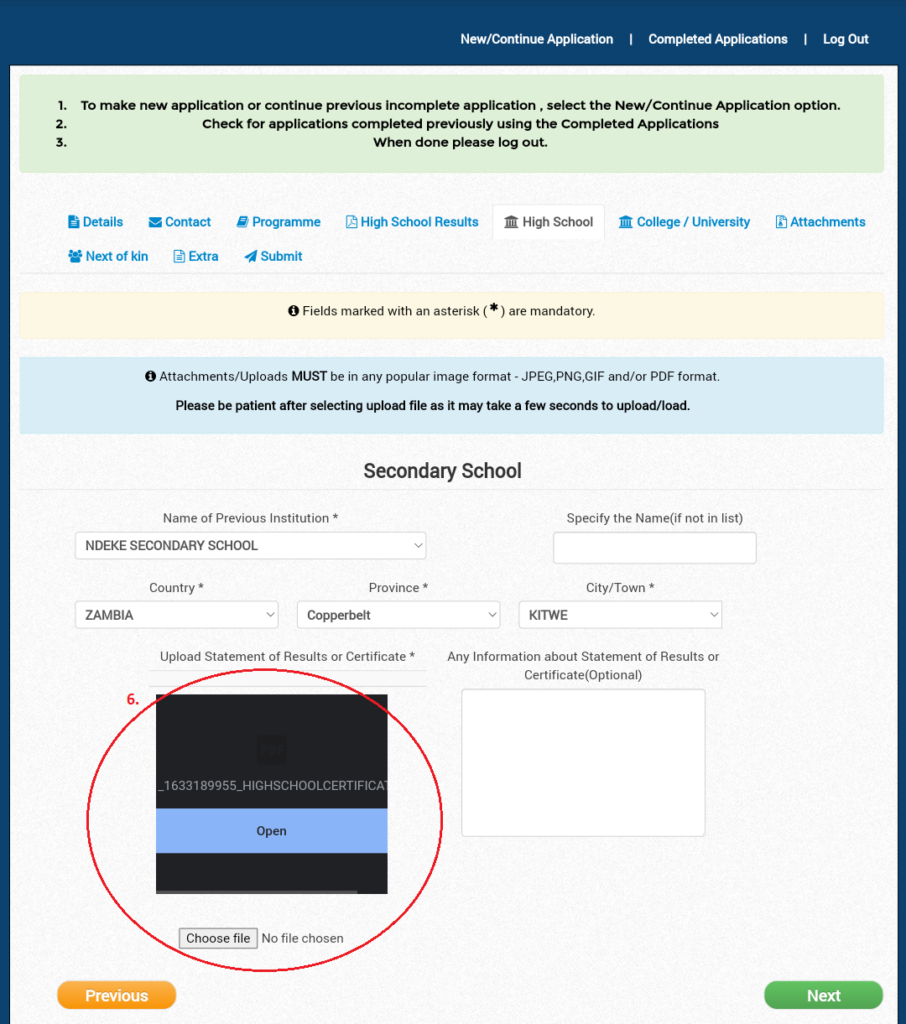
- This is the part where you upload your results. Some websites will specify the format in which you are supposed to have this document e.g., PDF, JPEG, or PNG. Where it is not specified, upload in PDF format.
COMMENTS
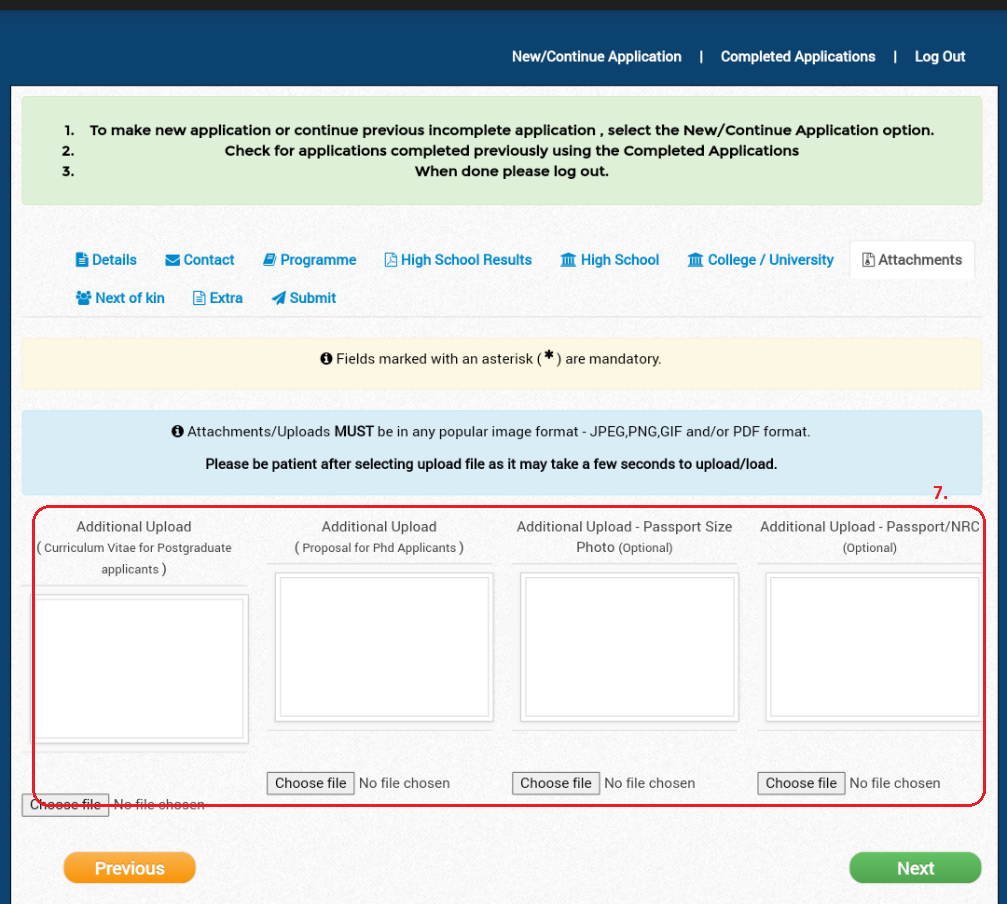
- These are additional documents that you may be required to upload. On some websites, this section may also include uploading of a scanned copy of the bank slip for your application fee. Where it is not specified, upload photos in JPEG and other documents in PDF format.

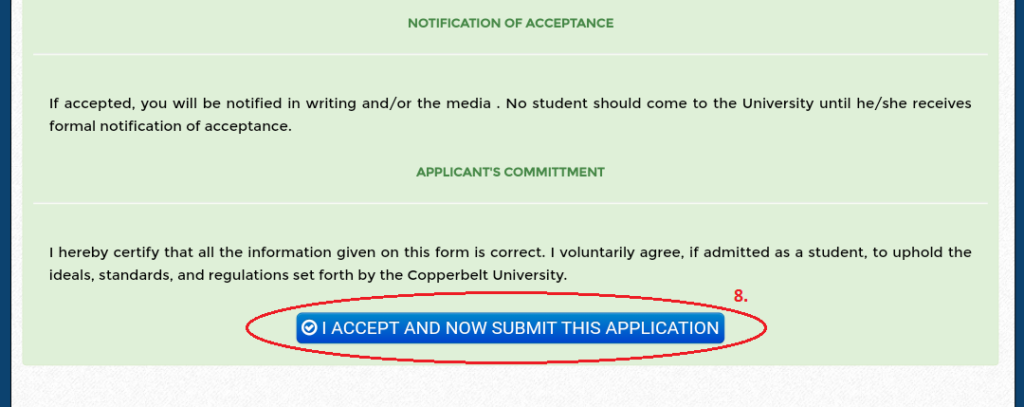
COMMENTS
- After you have entered all the necessary information into the system, you can now submit the application. Some websites will give a summary of the application so that you can check the data you entered. If a website doesn’t do so, be sure to check the previous sections (by scrolling through the tabs) so that you make sure the data is correct